Tesla Roadster

GPS Corruption Cable

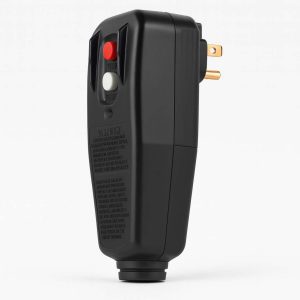
This cable allows you to resolve your own Tesla Roadster GPS Firmware corruption issues.

Since the summer of 2019, the Garmin GPS firmware has had a week number overflow firmware bug that causes the GPS to roll back to the year 2000.

Although this does not affect overall vehicle functionality, it does cause the timestamps in the log files and battery health logs to be recorded incorrectly leading to difficulty diagnosing faults.

Access to accurate log file information continuously being recorded in a Roadster is crucial in isolating faults, and establishing timelines for errors. It can also be useful in determining patterns and trend analysis for ESS Battery Pack condition and degradation.

For Roadsters in our Service Center, we developed this custom cable which allows you to reprogram and update the Garmin firmware to resolve this software bug.

With this cable plugged into the VMS harness, using the Garmin patch software, you can now resolve this yourself.

Step 1
Updating the Firmware

Go to the Garmin website and download the necessary files from Garmin Support

  1. Make sure you have computer running Windows XP or later.
    a. (For the purposes of this guide I will be using Windows 10)
  2. Install the USB drivers with – USBDrivers_2312.exe
  3. Install the firmware updater tool – GPS18xPC_LVC_440.exe
    a. It will extract the Updater executable and the region file to – C:\Garmin\GPS18x_PC_LVC
  4. Plug in the cable to connect to the GPS device to two free USB ports on your computer.
  1. Run the Sensor Configuration executable – SNSRXCFG_330.exe by right clicking on the executable and selecting “Run as Administrator”.
    Running the Sensor Configuration executable as administrator is critical as the Updater executable needs administrator rights to run.
  2. Select the Base Model as GPS 18x PC/LVC and then click the OK button.
  3. Go to Comm in the toolbar at the top, and select Setup from the dropdown menu
  4. Under Serial Port, select the COM port that your USB to Serial connector is using, and set the Baud Rate to manual and at 4800. Click the OK button.
    You can find which COM port the USB to Serial device is using by open the Device Manager (Start Menu->Device Manager). You will find the device under Ports (COM & LPT), and the COM port number in parentheses next to the USB to Serial device.
  5. Go to Comm in the toolbar at the top, and select Connect from the dropdown menu
  6. Go to Config in the toolbar at the top, and select Update Software from the dropdown menu
  7. The software will ask you to select the new region file, and it will automatically open the folder created earlier C:\Garmin\GPS18x_PC_LVC
  8. Select the region folder named 079601000XXX.rgn, where XXX is the version number of the software. In our case it will be v4.40 so look for the file 079601000440.rgn.
  9. The software will then ask you to select the updater executable that will perform the firmware update, and again it will automatically open the folder created earlier C:\Garmin\GPS18x_PC_LVC
  10. Select the Updater.exe executable
  11. On the Updater software, next to Serial Port set the same COM port you used earlier, and set the Baud Rate below it to 9600. Click the OK button.
  12. Wait for the update to finish. It takes about 4-5 minutes to finish
  13. Once the update has successfully finished, click the OK button.
  14. If you wish to double check the firmware version you need to reconnect to the GPS device. Close the Sensor Configuration executable SNSRXCFG_330.exe.
  15. Run the Sensor Configuration executable SNSRXCFG_330.exe. Running it administrator is not necessary when checking the firmware version on the GPS device, only when updating the firmware.
  16. Follow the instructions for checking the firmware version in the section below “Checking the Installed Firmware Version” starting at step 7

Step 2
Checking the Installed Firmware Version

Go to the Garmin website and download the necessary files from Garmin Support

  1. Make sure you have computer running Windows XP or later
    a. For the purposes of this guide I will be using Windows 10
  2. Install the USB drivers with USBDrivers_2312.exe
  3. Plug in the cable to connect to the GPS device to two free USB ports on your computer
  1. Run the Sensor Configuration executable SNSRXCFG_330.exe
  2. Select the Base Model as GPS 18x PC/LVC and then click the OK button
  3. Go to Comm in the toolbar at the top, and select Setup from the dropdown menu
  4. Under Serial Port, select the COM port that your USB to Serial connector is using, and set the Baud Rate to manual and at 4800. Click the OK button.
    You can find which COM port the USB to Serial device is using by open the Device Manager (Start Menu->Device Manager). You will find the device under Ports (COM & LPT), and the COM port number in parentheses next to the USB to Serial device.
  5. Go to Comm in the toolbar at the top, and select Connect from the dropdown menu
  6. Go to View in the toolbar at the top, and select NMEA Transmitted Sentences from the dropdown menu
  7. Wait 30 seconds to a minute for the $PGRMT message near the bottom to come through and display the firmware version near the end of the string right after GPS 18x-LVC software ver.

Call our Tech Support hotline for details or installation assistance – 623-433-8500


$97.50

Share this product with your friends