
The purpose of the 12-volt battery in a Roadster is to power most of the electronics, including headlights, audio systems, fans, and modules that require 12 volts. The 1.5 series Roadsters, 2008-2009, did not have a 12-volt battery, and the source of power for these devices was one of the first two sheets in the ESS pack, which ended up being a design problem since it unevenly wears out two sheets out of 11. By the 2.x series Roadsters, a 12-volt motorcycle battery was installed, powered by the output of a DC-DC converter that drew its power from all 11 sheets.
This battery location was a design compromise at best, and the limited accessibility makes most replacements an expensive trip to a service center.
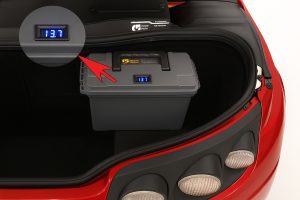 By relocating the battery into unused trunk space, a battery swap becomes a 3-minute DIY effort.
A voltmeter provides a continuous display and early warning when the battery is due for replacement. The output of the DC to DC converter will maintain this battery at a float charge of 13.6 volts DC. Voltages below 13 volts DC indicate it is time to replace the battery.
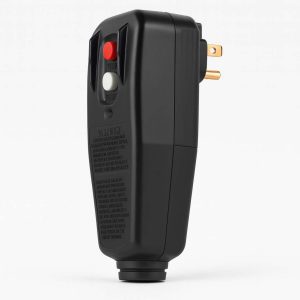
The GPS battery supplied with this kit is superior to the 8-amp-hour motorcycle battery by providing 4 more amp hours of power and has quick disconnect tabs, making replacement a cinch.
Turn off the APS through the VDS screen diagnostic menu. This removes 12 volts from the circuit you are about to work on. (Call for free tech support.)
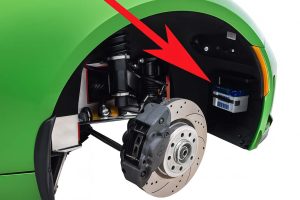
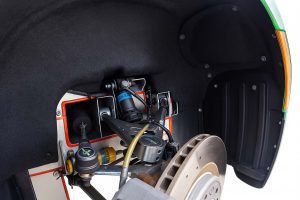
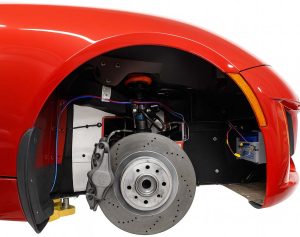
To gain access to the old 12-volt battery, remove the wheel, the access panels shown, and the fender skirt using a 10 mm socket wrench.
Make sure to pay attention to the jack point decal under the Roadster.
Disconnect both the plus and minus wires.
Remove the old battery and reattach the retaining bracket. Cut off both terminal lugs. Strip back the wire about 1/4″.
Both will be crimped onto the battery extension cable later.
Disconnect both the plus and minus wires from the old battery and remove it. Observe polarity when crimping the black extension wire to minus (-) and the red wire to plus (+).
Using a connector crimp tool and the supplied butt splice connectors, crimp them onto the stripped-back portion of these wires in preparation for splicing in the extension wires to the trunk.
Finally, crimp the red and black extension wires onto the butt splice connectors.
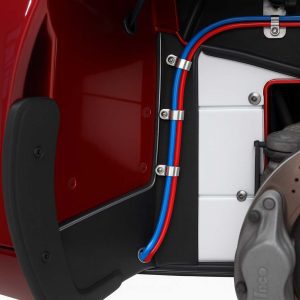
 Route the heavy gauge 30 Amp extension wires around the fender wheel well as shown, clamping securely away from any moving suspension components.
Use tie wraps and supplied clamps as shown.
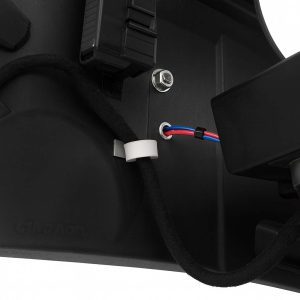
Drill a 3/8″ hole into the running board cavity as shown.
Using a fish tape, or stiff metal wire, start pushing the fish tape into the hole until it protrudes from the rear fender well.
Tape the extension wires onto the fish tape, and pull the wire through to the rear.
Route the extension wires from the front wheel well, avoiding any suspension components, under the PEM.
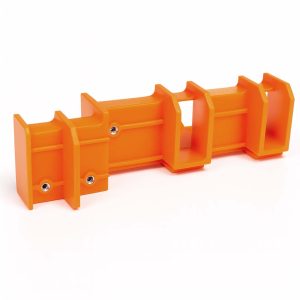
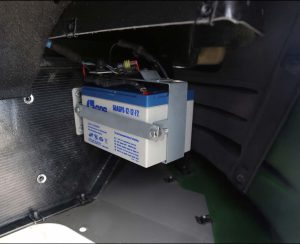
Mount the battery box just below the trunk tub upper seal.
Once the battery box is mounted, drill another 3/8″ hole through the trunk into the battery box for the extension wires.
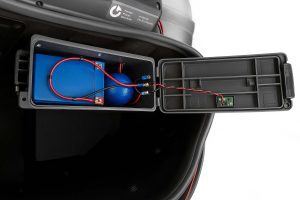
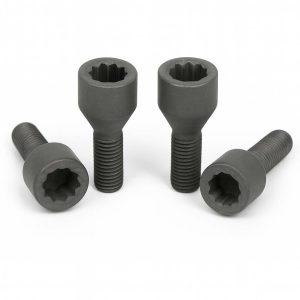
Mount the battery box using the supplied button head screws inside the box.
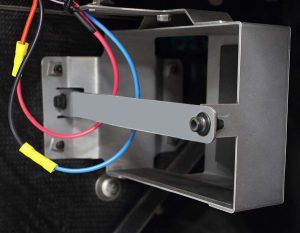
Route in the extension wires from the rear, trim excess wire, and terminate and crimp the spade lug terminals supplied.
Observe polarity, keeping plus (+) and minus (-) wires together on the terminal block inside the battery box.
As always, call us for tech support or pre-sales questions. We also have a YouTube video describing this installation process